
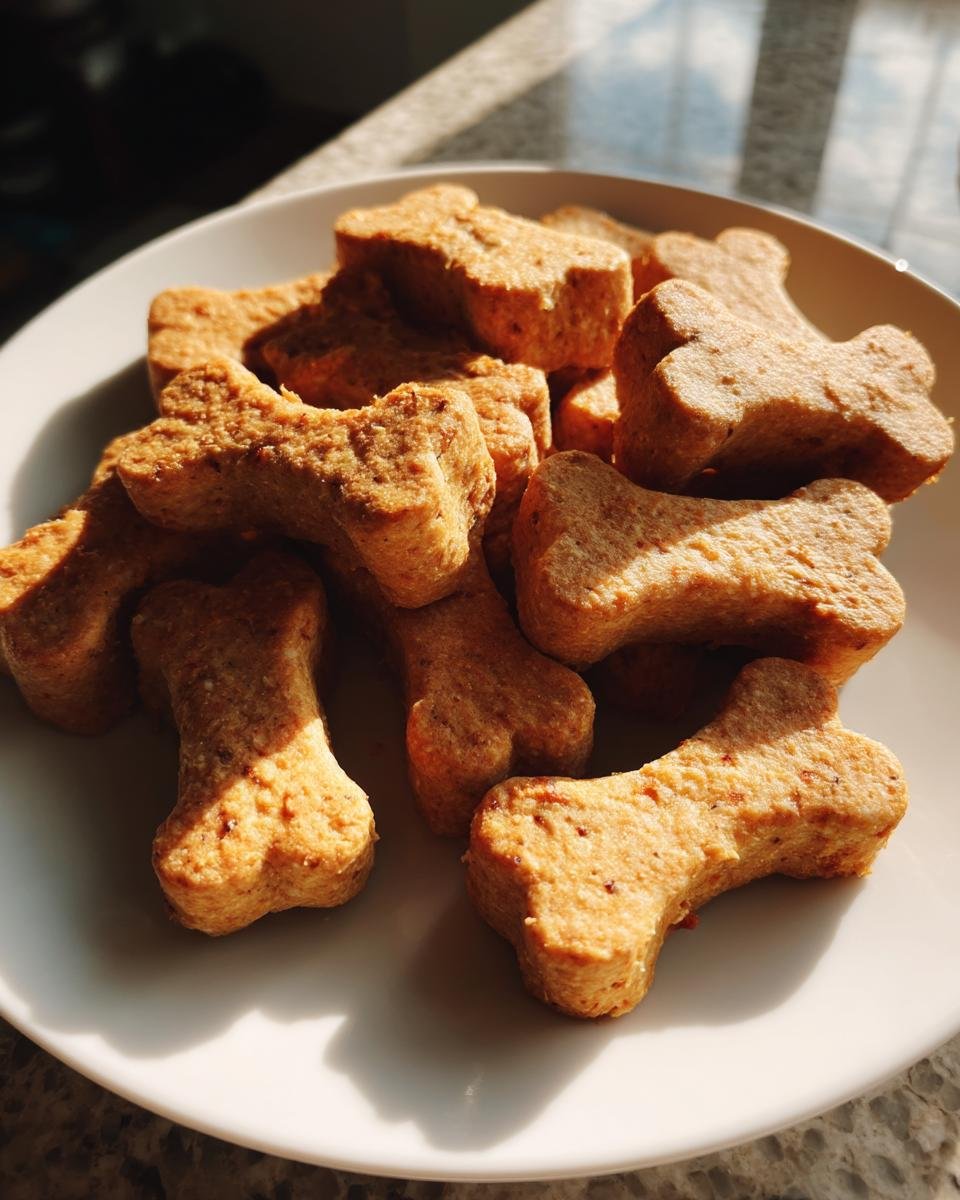
You know that look your dog gives you when you’re eating something delicious? The one where their eyes turn into sad, hungry moons? That’s exactly how my golden retriever Baxter guilt-tripped me into creating these easy DIY dog biscuits. After one too many questionable ingredient lists on store-bought treats (seriously, what is “animal digest”?), I started mixing peanut butter and pumpkin in my kitchen. Five simple ingredients later – no preservatives, no mystery powders – I had biscuits that made Baxter’s tail thump like a metronome.
I’ll never forget the first batch. My flour-dusted counter looked like a blizzard hit it, and Baxter kept shoving his nose under my elbow trying to “help.” But when those golden-brown bones came out of the oven smelling like a peanut butter wonderland? Pure magic. Now we’ve ditched the pricey packaged snacks for good. These biscuits work wonders for dogs with sensitive stomachs like my big guy’s, and they’re so simple even my 8-year-old niece can help make them (with supervision, obviously – flour fights are real).
What I love most? You probably have everything you need in your pantry right now. Whole wheat flour, a scoop of peanut butter (xylitol-free, always!), some pumpkin puree – it’s basically a doggy version of banana bread ingredients. No fancy equipment, no weird additives. Just honest, tail-wagging goodness that’ll make your pup think you’re a canine pastry chef.
Why You’ll Love These Easy DIY Dog Biscuits
Let me count the ways these biscuits will become your go-to treat (and why your pup will agree):
Wallet-Friendly Woofs
I calculated it once – these cost about 1/4th of pricey boutique biscuits. Baxter plows through a $12 bag in days, but this recipe makes 24 hearty treats for less than $3 total. That’s pennies per tail wag!
Your Dog’s Personal Chef
The customization is the secret sauce! Swap pumpkin for mashed banana, add a sprinkle of parsley for fresh breath, or mix in crumbled bacon for picky eaters. Last week I pressed crushed blueberries into the dough – my labradoodle thought it was Christmas morning.
No Mystery Meat Here
You’ll recognize every ingredient in these easy DIY dog biscuits. No more squinting at labels wondering if “meat meal” means chicken or cardboard. The pumpkin soothes sensitive tummies, and peanut butter’s protein keeps energy levels steady.
Easier Than Teaching “Stay”
Seriously – if you can make cookie dough, you’ve got this. One bowl, five ingredients, and about 30 minutes start to finish. Even my neighbor’s hyperactive terrier “helps” mix the dough (though we lose a few biscuits to taste-testing).
Ingredients for Easy DIY Dog Biscuits
Let’s raid that pantry! These five simple ingredients make magic happen – but quality matters. Here’s what you’ll need:
Whole Wheat Flour (2 cups, not self-rising)
I always grab the regular whole wheat flour – self-rising has baking powder that’ll make these biscuits puff up like balloons. If your dog’s sensitive to wheat, hang tight – I’ve got swaps below!
Peanut Butter (½ cup, unsalted & xylitol-free)
This is non-negotiable: check labels for xylitol! That artificial sweetener’s deadly for dogs. I use natural creamy PB where the only ingredients are “peanuts” and “salt.” Crunchy works too if your pup likes texture.
Pumpkin Puree (¼ cup, not pie filling)
The canned stuff labeled “100% pumpkin” – pie filling has spices and sugars. Pro tip: freeze leftover puree in ice cube trays for future batches!
Egg (1 large, room temp)
Cold eggs make the dough stubborn. I just pop mine in a bowl of warm water for 5 minutes while gathering other ingredients.
Water (⅓ cup, add gradually)
Start with ¼ cup and add more as needed. Humidity affects dough differently – we want play-doh consistency, not soup!
Safe Ingredient Swaps
Got a pup with grain allergies? Out of pumpkin? No sweat – here’s how to mix it up:
Flour: Swap wheat flour 1:1 with oat flour (grind rolled oats in a blender) or coconut flour (use ¾ cup – it’s thirstier!).
Peanut Butter: Almond butter works if your dog tolerates nuts. Sunflower seed butter’s another great option – same ½ cup measurement.
Pumpkin: Mashed sweet potato or ripe banana (¼ cup) adds similar moisture. For dogs needing low-sugar options, try unsweetened applesauce.
Always introduce new ingredients slowly – my rule is “one swap per batch” to spot any tummy troubles. Baxter once ate a blueberry version so fast I thought he’d turn into a Smurf!
Essential Tools for Easy DIY Dog Biscuits
Don’t worry about fancy equipment – my first batch used a wine bottle as a rolling pin! Here’s what really helps: A sturdy rolling pin (flour it well to prevent sticking), any shape cookie cutter (bone-shaped is fun, but a shot glass works in a pinch), parchment paper (lifesaver for easy cleanup), a big mixing bowl (ceramic beats plastic – dough doesn’t slide around), and an airtight container. I use an old coffee tin – keeps biscuits crunchy for weeks!
How to Make Easy DIY Dog Biscuits: Step-by-Step Guide
Let’s get those pawsitively perfect biscuits made! I’ve burned a batch or two over the years (RIP, charcoal hockey pucks), so follow these steps for foolproof treats. Pro tip: Keep a spoonful of peanut butter nearby – your “helper” will stay occupied licking instead of counter-surfing!
Preparing the Dough
First, fight the urge to dump everything in the bowl at once – we’re not making smoothies here! Scoop your flour without packing it down, then level it with a knife. I learned the hard way that packed flour makes dry biscuits that could double as frisbees.
Mix dry ingredients first – flour goes solo in the bowl. Now attack that peanut butter! If it’s stiff from the fridge, nuke it for 10 seconds. Use your sturdiest spoon to smear it against the bowl’s sides – we want zero PB clumps. Add pumpkin and egg, then stir like you’re kneading bread dough. When it looks like crumbly moon sand, drizzle in water 1 tablespoon at a time. Perfect dough should feel like a firm stress ball – springs back when poked.
Shaping Your Dog Treats
Dust your counter generously – this dough loves to stick! Roll it between ¼”–⅜” thick. Too thin? Biscuits turn into crackers. Too thick? You’ll need dinosaur-sized chewers.
No cookie cutters? No problem! I’ve used:
– Shot glasses for circles
– Pizza cutter for squares
– Butter knife to carve bone shapes freehand (my abstract art phase)
Press scraps together and re-roll – dogs don’t judge lopsided biscuits! If dough gets sticky, pop it in the fridge for 15 minutes. Baxter once stole a dough ball mid-roll – now I keep extras on upper racks!
Baking & Cooling Process
Middle oven rack is your friend – ensures even browning without burnt bottoms. Bake at 350°F until the edges turn golden like toasted marshmallows. Peek at 20 minutes – they should feel firm but not rock-hard.
Cooling is crucial! I spread biscuits on a wire rack so air circulates. Wait at least 1 hour before storing – trapped steam turns crispy treats soggy. Test by breaking one open: if you see steam, let them chill longer. My beagle once scorched her tongue diving into warm biscuits – lesson learned!
Smell that? Pure doggy delight! Now try not to trip over your furry taste-tester sprinting to the kitchen…
Creative Variations for Easy DIY Dog Biscuits
Once you’ve mastered the basic recipe, it’s time to mix things up! My dogs go nuts for these twists – literally. Last Thanksgiving, my sister’s terrier performed six consecutive spins for a bacon version. Here’s how to keep your pup guessing:
1. Bacon & Parsley Power Bites
Stir in ¼ cup cooked bacon bits (low-sodium!) and 2 tbsp chopped fresh parsley. The parsley combats bacon breath – genius, right? I bake these when my neighbor’s smelly bulldog visits. Pro tip: Render the bacon fat first and brush it on the biscuits pre-baking for extra crispiness!
2. Blueberry Oat Crunch Easy DIY Dog Biscuits
Swap ½ cup flour with rolled oats and knead in ⅓ cup dried blueberries (fresh ones make dough too sticky). The antioxidants turn tongues blue – my niece calls them “smurf-tastic.” Bonus: Oats help senior dogs’ digestion. Just don’t panic when their poop turns navy blue!
3. Golden Turmeric Coconut Cookies
Add 1 tsp turmeric (anti-inflammatory!) and 2 tbsp coconut oil instead of water. The coconut makes coats shiny enough for doggy Instagram fame. My arthritic lab mix gets these weekly – she prances like a puppy afterward. Warning: Start with ½ tsp turmeric unless you want a Jackson Pollock-style kitchen!
Remember, dogs taste through their noses – strong scents like peanut butter or bacon make even picky eaters drool. I once added a dash of cinnamon to the turmeric batch… my pack acted like I’d invented bacon-flavored oxygen!
Storing Your Homemade Dog Treats
These easy DIY dog biscuits stay fresh in an airtight container for 2 weeks – if your pup doesn’t inhale them first! I use Grandma’s old cookie jar (Baxter knows to sit and stare at it politely). For longer storage, freeze them in ziplock bags – they’ll keep 3 months. Just thaw overnight on the counter when the “cookie emergency” bark strikes.
Moisture is the enemy here. I learned this after storing a batch in a cute but slightly damp tin – ended up with soggy biscuits that could’ve doubled as hockey pucks. Toss in a silica packet or dry rice tied in cheesecloth to absorb humidity. Pro tip: Layer biscuits with parchment paper so they don’t stick together. My golden retriever once pulled the whole container down trying to separate two glued-together treats – flour explosion meets happy dog tornado!
Nutritional Breakdown
Here’s the scoop on what’s in these easy DIY dog biscuits (per treat). Remember – dogs don’t count calories, but it’s nice to know you’re giving them the good stuff!
| Nutrient | Amount |
|---|---|
| Calories | 25 kcal |
| Protein | 1g |
| Fat | 1.2g |
| Carbs | 3g |
| Fiber | 0.5g |
These numbers can shift if you make swaps – using coconut flour adds more fiber, while bacon bits increase fat content. My golden retriever’s review? “Five woofs – would happily eat 12 in one sitting.”
FAQ: Easy DIY Dog Biscuits
Can puppies eat these biscuits?
Absolutely! These easy DIY dog biscuits are puppy-approved. Just break them into smaller pieces for tiny teeth – I use a pizza cutter to quarter them for my sister’s new French bulldog. Keep portions small (1-2 pieces daily) since puppies have sensitive tummies. Pro tip: Swap pumpkin for mashed banana if your pup needs extra potassium for growing muscles!
How do I know if peanut butter is xylitol-free?
Xylitol hides in sneaky places! I literally stand in the grocery aisle squinting at labels like a detective. Look for “no xylitol” claims on the front, then scan ingredients for words like “birch sugar” or “sugar alcohol.” When in doubt, stick to brands like Smucker’s Natural or Teddie’s – I’ve called their customer lines to confirm. Your dog’s wagging tail is worth the extra minute!
Can I make these grain-free?
You bet! These easy DIY dog biscuits adapt beautifully. Swap whole wheat flour 1:1 with oat flour (blitz rolled oats in a blender) or use ¾ cup coconut flour (it’s thirstier!). My neighbor’s grain-sensitive schnauzer goes wild for the coconut version – just add an extra egg yolk if the dough feels crumbly. Bonus: Coconut flour makes your kitchen smell like a tropical vacation!
Why did my dough crack when rolling?
Ah, the dreaded crumble! This happens when the dough’s too dry – usually from over-measuring flour. Next time, fluff your flour before scooping and level with a knife. If it still cracks, knead in 1 tsp water or pumpkin at a time until it’s play-doh soft. I once salvaged a batch by rubbing a damp paper towel over the dough – saved me from making “biscuit crumble topping” instead!
How long until treats go bad?
Properly stored in an airtight container, these easy DIY dog biscuits stay fresh 2 weeks. But let’s be real – they rarely last that long! If they develop spots or smell like old socks, toss ’em. Frozen biscuits keep 3 months – my dogs recognize the freezer opening sound and come running. Pro tip: Write the date on containers with a Sharpie… unless your labrador eats the marker too!
Share Your Paw-some Creations!
Now it’s your turn! I’d love to see those wagging tails and creative biscuit shapes – did your pup get a bone-shaped masterpiece or an abstract dough blob? Snap a pic of your easy DIY dog biscuits (and their very happy taste-tester) and tag #WoofWithProof on social media. Bonus points for mid-crumb shots featuring a crumb-covered snout!
Rate your biscuit adventure below – did it earn five enthusiastic tail wags or a skeptical sniff? My golden retriever Baxter personally judges all submitted photos… though he tends to drool on my phone screen when peanut butter biscuits appear!
Print5-Ingredient Easy DIY Dog Biscuits Your Pup Will Devour
- Total Time: 35 minutes
- Yield: 20-24 biscuits 1x
- Diet: Low Lactose
Description
Whip up simple, healthy dog biscuits at home with just a few ingredients. These treats are perfect for rewarding your pup or catering to dogs with sensitive stomachs.
Ingredients
- 2 cups whole wheat flour
- 1/2 cup unsalted peanut butter
- 1/4 cup pumpkin puree
- 1 large egg
- 1/3 cup water
Instructions
- Preheat your oven to 350°F (175°C) and line a baking sheet with parchment paper.
- Mix flour, peanut butter, pumpkin puree, and egg in a bowl until combined.
- Gradually add water until the dough forms a ball.
- Roll the dough to 1/4-inch thickness and cut into shapes using cookie cutters.
- Bake for 20-25 minutes until golden brown.
- Cool completely before serving or storing.
Notes
- Store in an airtight container for up to 2 weeks.
- Check peanut butter for xylitol, which is toxic to dogs.
- Add more water if dough is too dry, or flour if too sticky.
- Substitute pumpkin with mashed sweet potato for variety.
- Prep Time: 10 minutes
- Cook Time: 25 minutes
- Category: Dog Food
- Method: Baking
- Cuisine: Pet
Nutrition
- Serving Size: 1 biscuit
- Calories: 25 kcal
- Sugar: 0.2g
- Sodium: 5mg
- Fat: 1.2g
- Saturated Fat: 0.3g
- Unsaturated Fat: 0.7g
- Trans Fat: 0g
- Carbohydrates: 3g
- Fiber: 0.5g
- Protein: 1g
- Cholesterol: 2mg